Sunday, July 25, 2010

Blondie Bars

I have being a good girl, well kind of, and keep eating stupid stuff like salad, veggies, and you know everything else that falls into that boring catagory, but when you see yummy, gooey, melt-in-your-mouth things, I just can't help myself.  Blondie Bars, doesn't it just sound like something I should have in my possesion?  Yes, Yes it does, and you have to admit,
It's looks pretty "Cool."


Blondie Bars
2 1/8 cups (10 1/2 ounces) all purpose flour
1/2 teaspoon salt
1/2 teaspoon baking soda
12 tablespoons butter (1 1/2 sticks), melted and cooled slightly
1 cup (7 ounces) light brown sugar
1/2 (3 1/2 ounces) cup granulated sugar
1 large egg
1 large egg yolk
2 teaspoons vanilla extract
2 cups chocolate chips (use your preference of semisweet, bittersweet, milk, white, peanut butter…the options are endless!)


Preheat the oven to 325 degrees. Adjust the oven rack to lower-middle position. Line a 9X13-inch baking pan with foil, letting the excess hang over the edges of the pan by about 1 inch so you can grab those edges and pull the brownies from the pan after they have baked. Spray the foil-lined pan with nonstick cooking spray.


Mix the flour, salt, and baking soda together in medium bowl; set aside. Whisk the melted butter and sugars in a large bowl until combined. Add the egg, egg yolk, and vanilla and mix well. Using a rubber spatula, fold the dry ingredients into the egg mixture until just combined; do not overmix. Fold in the chocolate chips and turn the batter into the prepared pan, smoothing the top with the spatula.


Bake until the top of the bars is light golden brown, slightly firm to the touch, and edges start pulling away from sides of pan, 24-28 minutes. Cool on a wire rack to room temperature. Remove the bars from the pan by lifting the foil overhang and transfer them to a cutting board. Cut into 2-inch squares and serve. Eat, and feel really good about yourself, because come on, there's only so much time to LIVE. You can feel bad about it tomorrow, or not!


Saturday, July 24, 2010

"PIE" oneers

I loved this so much, I had to post this so I would actually do it! Enjoy

STAR-STUDDED MINI PIE


Buy 2 Refrigerated Pie Dough or Make Your Own

One Can Pie Filling (Cherry, of course)

2 T Butter, Melted

1/4 Cup Granulated Sugar
Preheat oven according to pie crust recipe.
Roll out your pie crust so it's just think enough to hold together and cover the muffin hole. Using a cookie cutter, or a cup with about a 3 1/2 inch diameter, cut out circles of dough.
Place each dough circle center in one of the mini-muffin tin wells. The edge should overhand a little. Gently roll the edge down with your fingers and them crimp it so it looks pretty.

Fill each mini pie a little over half full with filling. Don't go crazy and fill them to the top. Catastrophic things happen!
Next, you'll need your cute little stars. My star cutter is about 2'' across and it was the perfect size. If you can't find a cookie cutter you could always print out a stencil and cut the stars with a knife. You'd have to want these pretty bad though to go through that effort.

Dip your stars (both sides) in butter and then dredge in the sugar. Make sure to lick your fingers after the sugar starts piling up and making buttery sugar globs on your hands.

Place a star on top of each little pie. It's okay if it sink down, it will puff up when it bakes.

You can serve them warm or at room temp. And they can definitely be made hours ahead of time.

2 pie crusts should be plenty to do 24 mini-pies. Depending on the recipe or brand of crust you use, you may be able to get closer to 30.

Monday, July 19, 2010

Summertime

Growing up I spent so much of my time up "North" that I couldn't resist putting a few pics up just for good old times sake...


The only thing here missing are the "fish" so I figured the birds were entertaining too!


Boat Regatta on Island Park Reservoir


Yellowstone Canyon

Thursday, July 8, 2010

This blog is crazy

So, I've been really challenged getting things on this blog.  Pics won't download, kids clicking Nick Jr., when I'm posting, yep, tons of fun.  Here's another go of a couple of pics... I'll look behind my back so they don't sneak up on me...


Hi Big Blue Eyes
Two Little Princesses Who are Great Friends
Smile Girlies!

Handsome Boy at Field Day
Shoshone Falls Hanging Out


Talking about how this platform was constructed, supported, framed and maintained
Smile even if it's Sunny Outside
Two Little Dancers sweet and nice, two little dancers each dance twice,
 mommy gets her camera, and asks for a smile, they are fun and happy all the while.

There is a tiny part of a few happenings around here...more to come soon!

Thursday, June 24, 2010

Wednesday, June 9, 2010

Life is Good

I have so many things that have gone on in the last couple of months, where to start, well we made it through all of the school parties, class parties, teacher appreciation gifts, Dare Graduation which Payton was chosen to conduct for the 5Th grade. Finished a super soccer season with a tough final game, we won! (Almost all of our games as well) Finished Payton's soccer season and wrapped up piano for the summer, attended so many funerals I can't even remember how many we went to...have enjoyed seeing all of the green sneaking up on me and now in full force, HURRAY! Registered Abbie for another year of preschool, she's reading short stories now, so her teacher should love that, hmmm, have loved watching the boy and his friend have all sorts of adventures, shooting, driving, all at the age of 11, and getting ready for good Ol' Pine Basin Camp. Can't be live he's old enough to go, I'm so excited for him. Praying each weekend Marshall will have a victory, no wrecks, good engine, and safety, safety, safety, am looking so forward to walking at nights w/ my kids, getting ready to head South for some sun, and visiting friends from afar. I love having this new felt freedom of NO COMMITMENT too many busy mom things, and can just love my hubbie and kids and schedule what I'd like to do now. Am grateful that we live here and not in Washington to avoid many of the crazy storms they are suddenly having. Life is good, Life is good!

Thursday, March 11, 2010

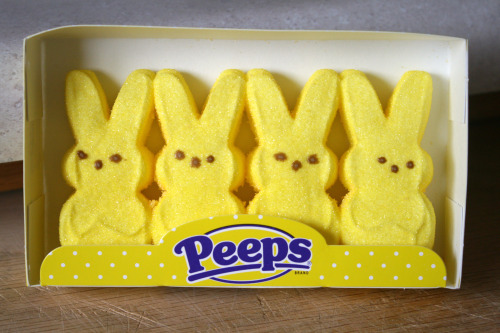
Choco Peeps

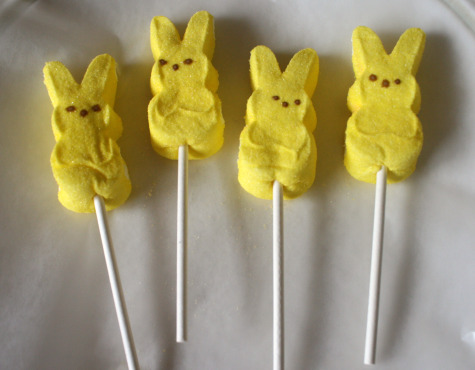
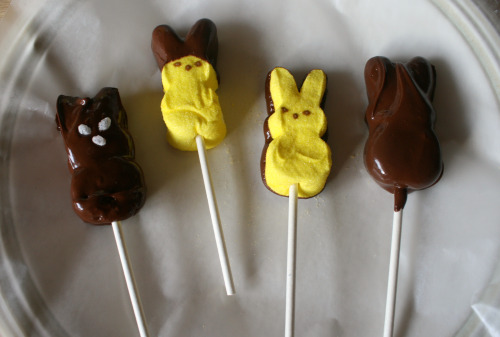
Chocolate Covered Easter Peeps on a Stick

Supplies for Chocolate Dipped Easter Peeps:

  • chocolate to melt
  • Easter Peeps
  • lollipop sticks
  • wax paper
  • plate or tray

To melt your chocolate, place it in a microwave safe bowl and microwave for 1 minute. Stir it, then if needed, microwave for another 20 seconds. Repeat if necessary. This works best with chocolate chips.

Place a lollipop stick into the bottom of the Peep. Dip your Peep into the chocolate and place on a plate lined with wax paper. Let this harden. You can also place them in the fridge for faster results.


Now you’re ready to Hippity-Hop on over to enjoy these Chocolate Covered Easter Peeps!

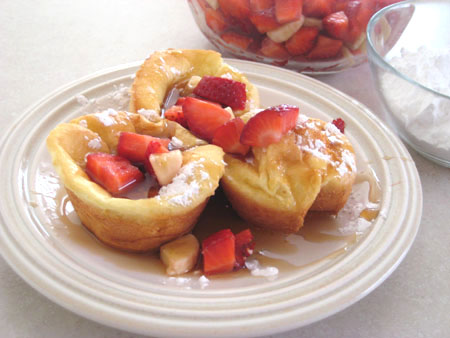
Pop up Pancakes

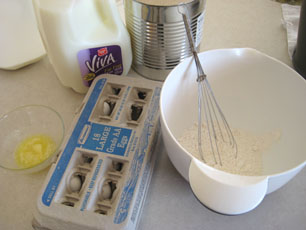
Pop Up Pancake Recipe – makes 24 muffins or fills a 9×13 baking pan

  • 1 cup milk
  • 1 cup flour
  • 6 eggs
  • 1/4 cup melted butter
  • dash salt
  • Preheat oven at 400*

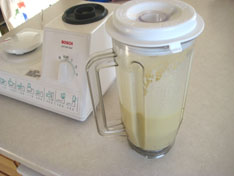
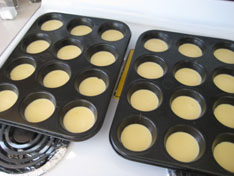
I like to blend all the ingredients in my blender. I have tried to whisk it or even use the electric mixer, but it seems to get the most smooth with a blender. Then grease your muffin tins or baking pan. My mom likes to bake these in a jelly roll pan.

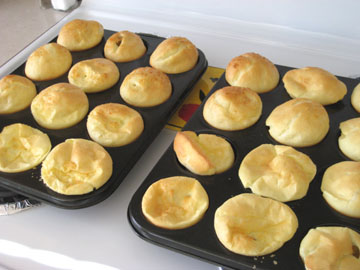
Bake them for 15 minutes, or until puffy and golden on top. Use a knife to pry them out, hopefully they were greased well enough and should pop right out.

Now they are ready for toppings. Enjoy, found this had to share!!!

Tuesday, February 9, 2010

Catching up

Happy Valentines and lots of other fun times

Cutie Patootie and her heart braid hair

Payton earning his Arrow of Light and advancing into Scouts

Little sisters having fun at the cabin


We're not in Kansas anymore Happy Halloween!


Poor little Payton "Wyatt Earp" was a little under the weather, but it did not stop him from trick or treatin...

Little Abs as the Tiger, Payton (Wyatt Earp) and Lindsey as Dorothy


Trunk or Treatin with the cousins


Looking back a few years racing snowmobiles
Last year driving Semis
This summer driving John Deere Tractors
Happy Birthday 11 Year Old BOY!

Birthday treats- Spudnuts- "Idaho Sundaes" Glazed donuts, ice cream, toppings and cherries on top, washing it all down w/ hot chocolate!!!


The AWESOME John Deere Cake, made by my niece, look at the tiny, tiny potatoes, they looked so real!!!

Crazy boys at the party, they get the whole Pose thing


Abbie, having her moment, and excited to get her big day started.
Breakfast in bed a fun tradition for our kids-
Abbie loving the "pink" one
Miniature Hamsters for her guests

The 20 pound Hamster Cake- this one took about 14 minutes. No cake pan here, just pure creativity, Hamsters????Yes momma, hamsters.

Ready or not, here comes the royal party
Sweet Six Lindsey Love


Lindsey Love, loving the dress, the girls, the pretties
This is the 10 minute version of Princess Carriage. When the kids are arriving in 10 minutes, this is all she wrote sisters! They loved it, it tasted great, and at least you could tell what it was, so anyone needing a carriage cake pan, yep we have you covered.


And Last but not least...our special kitty....


Don't you love the adornment done by our precious 4 year old. You can tell Beavis is thrilled with her makeover.


This is our cat "Beavis." She has become a legend amongst many. Anytime someone comes to our home and sees her waddle by, they get out their camera phones to take pictures. She is a sweet cat, unless you pick her up wrong, then she'll bite you, and is 15 years old. She is very obedient, and is a wonderful loving companion. About the name Beavis, she purred as a kitten just like Beavis's laugh on the MTV cartoon- Nope, Butthead is not my other cats name. It's Betsy-known as the skinny one.